How to use Advertising Ecosystem Demo#
Introduction#
Advertising Ecosystem Demo was published in January 2019. It is a demo of key components of the Adshares ecosystem that features a user-friendly web interface. There are two panels available - one for advertisers and one for publishers. The selection dropdown is available in the upper left corner. Each of the panels offers a wide range of settings and options. Both, the advertisers and the publishers, also have access to history, as well as to e-mail and password settings.
There is also a demo website, which showcases how banners can be displayed on publishers’ sites, depending on a device and window size.
Key components#
Advertiser module#
Defining campaigns, setting campaign budget and targeting. Before launching a campaign the advertiser has to transfer ADS to the account and provide a minimum amount for a 1-hour campaign. Once all is set, the campaign, along with all related information, is distributed across the network. Based on the results, funds are transferred every hour directly to the publisher.
Publisher module#
Registering websites on which banners will be displayed, generating code to be placed on websites. The module automatically scans Adshares network in search of ads.
AdSelect module#
Handling ads display. AdSelect learns based on interaction history, views, payments and credibility of the advertiser. The module optimises ads selection to maximise publishers’ revenue. As soon as the advertisement is selected and the campaign is live, all events are passed to the Advertiser module and the Publisher module.
AdPay module#
Calculating funds. Based on campaign results, the AdPay module decides once per hour how much should be transferred from the advertiser to the publisher. The transfer is made every hour, and the publisher can withdraw funds instantly. The advertiser sets the total budget for the entire campaign and the maximum budget for a specific event (CPM and CPC).
How to use the Demo - Advertisers#
Before using the Advertiser module, it’s necessary to join the Testnet. Then you must register on the platform and confirm your registration via email. The next step is the selection of Advertiser’s panel, in which you will find all campaign settings. Before uploading your banners and going through the campaign settings, it’s necessary to transfer ADS from the Testnet wallet to your account. Once your funds are on the account, you are good to go.
At this point, you need to create a new campaign, upload your banners and choose settings. Your ads will be displayed on our partners’ websites. Once your campaign is up and running, you can check how each of the banners is performing and make some adjustments to the campaign in case it’s needed. To achieve the best results, we advise to always upload banners in all formats supported by the platform.
All events are balanced on an hourly basis, and payments are made instantly, which helps optimising campaign settings.
How to use the Demo - Publishers#
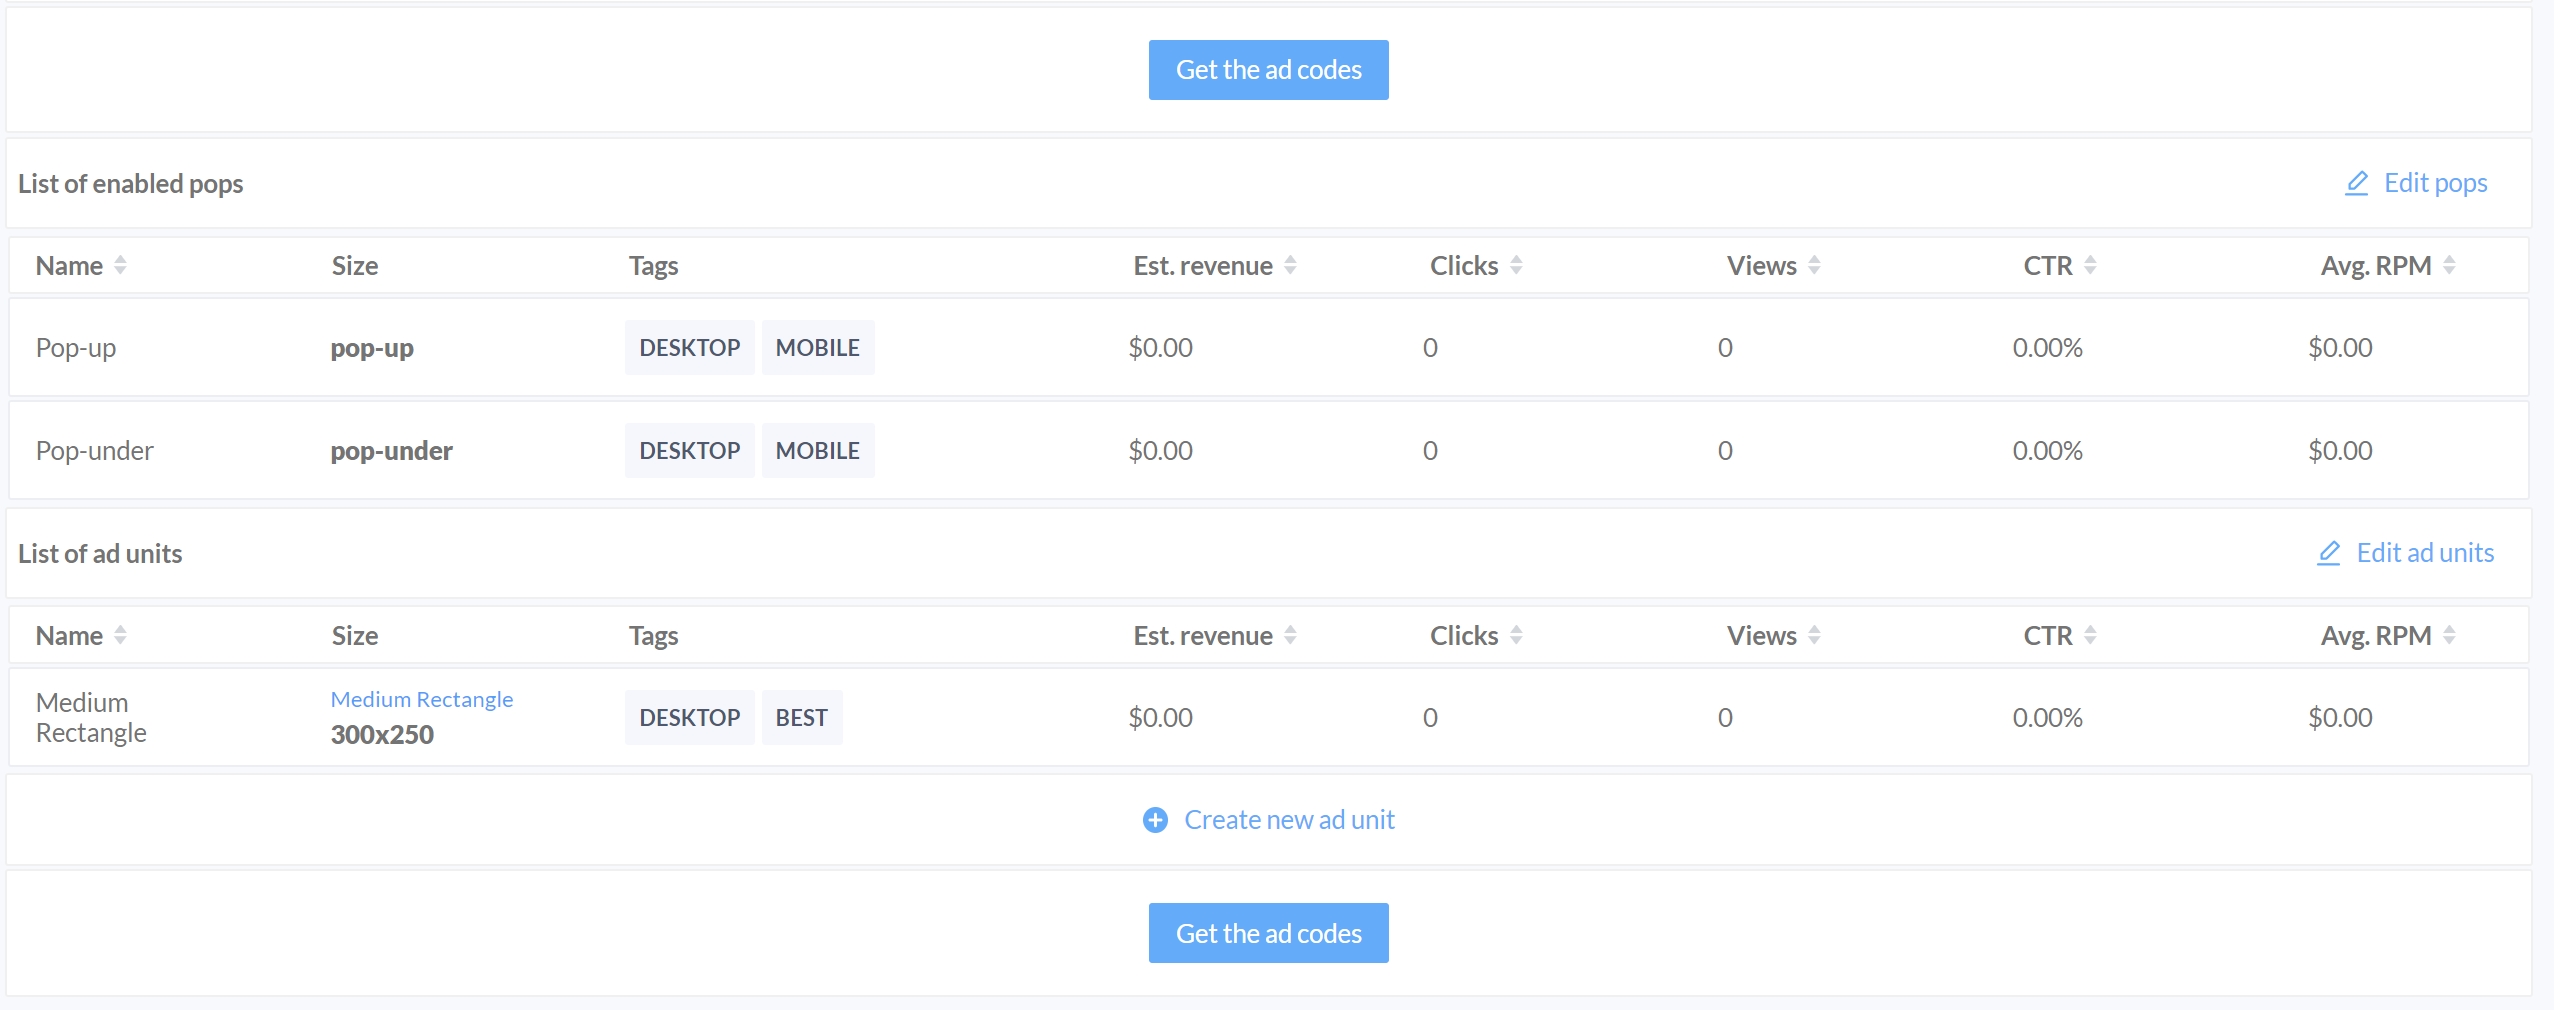
Once you register and confirm your registration via email, you need to select “Publisher” in the upper left corner. Next, you have to define a site you want to place banners on and then determine the ad unit. The last thing you need to do is to generate the code and place it on your website.
In case you placed your code on more than one website you can manage all sites from “My sites” page. There is also “My ad-units” page where you generate code based on banner dimensions.
Payments from advertisers are made on an hourly basis, which lets the publisher see immediate effects of campaigns and withdraw funds right away.
How to generate code and place it on a website - Publisher module#
First, it is necessary to add at least one site on which ads will be displayed. To do so you need to hit the “Add new site” button in the upper right corner of the Publisher module and follow instructions. Once the site is added, it becomes visible on the bottom of the main dashboard.
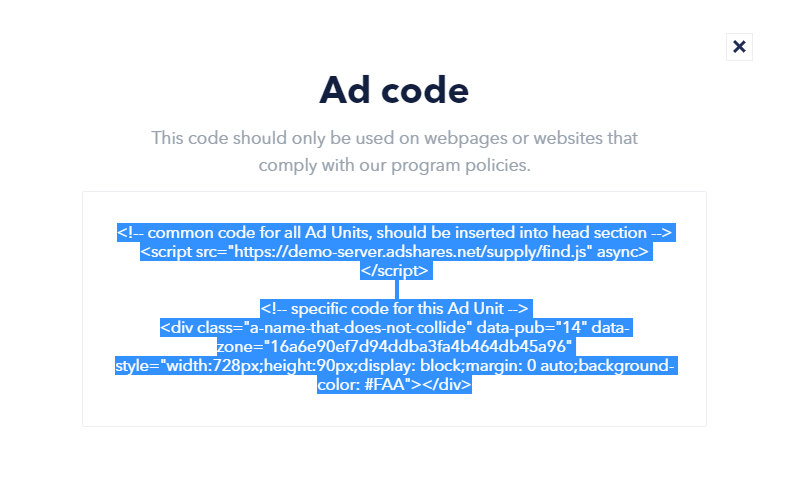
To get the code to be placed on your website you need to click the website name and then the “Get code” button.
The generated code must be copied and pasted on your website in a place of your choice.
How to place an Ad Unit on a Wordpress website#
The code can be generated and placed on a website in a way described above. Additionally, we developed a plugin for WordPress websites, which provides integration with Adshares AdServer for publishers. It makes the implementation even more straightforward and automates the process of placing the code on the website.
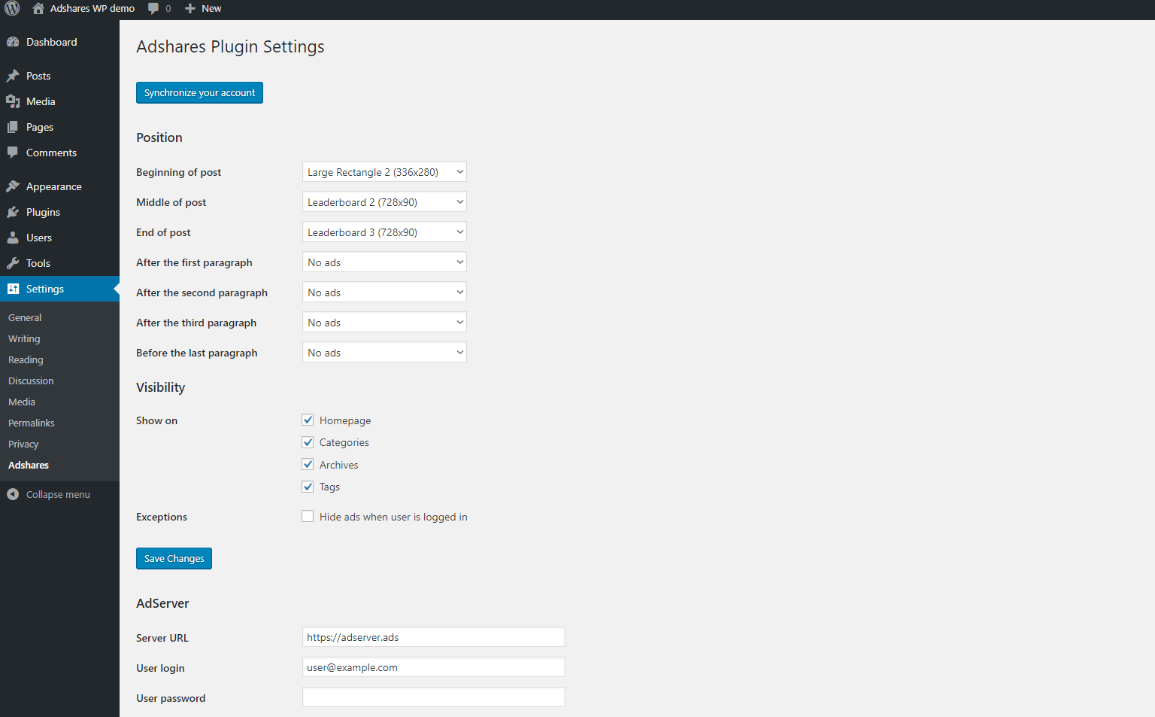
The installation is very simple. You just need to go to Your Website -> Plugins -> Add New, search for “Adshares” and click “Install Now”. There is also an alternative installation for those who prefer to use Composer.
Once the plugin is installed, all you need to do is type in https://demo.adshares.net as “Server URL”, log in into your Adshares account using your registration credentials, and select which ad units will be displayed. The plugin supports various options for position and visibility.
In case of high demand for a similar plugin for other popular platforms, we may consider creating dedicated plugins. If you own a website based on a popular platform and would be in interested in such a plugin, please get in touch with us.